Introduction
This is user documentation for the Cashier application.
Cashier is a part of the Plain-Text Accounting (PTA) ecosystem, more-specifically the Ledger ecosystem.
Ledger (ledger-cli) is a command-line program for personal finance. It runs on multiple plaftorms.
Set-up
Quick Setup
To start using the application, it is necessary to perform an initial setup.
- Set up the data source.
- Customization.
- Perform initial synchronization.
Data Source
Configure the data source by going to Sync and selecting the desired backend.
Once selected, click the Configure button to perform the backend configuration.
Customization
Customization is done in the Settings screen.
Initial Synchronization
While on the Sync screen, perform the initial synchronization with all the options selected.
Home
This is the initial screen you will see in Cashier. It displays the most relevant information and the items that require your attention.
The layout includes the navigation bar on the side and the main content area consisting of four cards showing:
- favourite accounts
- device journal
- scheduled transactions
- synchronization panel
Favourite Accounts Card
Displays the first 5 accounts selected as Favourites.
Tapping on the card will open the Favourite Accounts screen.
Device Journal Card
Displays the list of transactions stored on the device. As other cards, it shows only the latest 5 transactions. This is a quick indicator you can check to confirm if you have entered the latest transactions.
Tapping on Journal card will lead you to Journal
Scheduled Transactions Card
Displays the first 5 scheduled transactions, ordered by the due date. The color also indicates whether the due date is
- in the future (green),
- today (yellow)
- overdue (red)
Tapping on the card will open Scheduled Transactions.
Financial Forecast Card
This card displays the forecast for the selected period.
On the settings screen, accessible through the cog button at the top, you can set the number of days for the forecast, as well as the accounts to be included in the forecast.
The balances for the selected accounts are then projected for the period using the information from the Scheduled Transactions.
Navigation
The navigation points to the main sections of the application:
- Home
- Journal
- Favourites
- Accounts
- Payees
- Asset Allocation
- Scheduled Transactions
- Cloud Backup
- Settings
- Help
- About
Favourites
Favourites are a smaller sub-set of your accounts. Here you can see their account balances.
This screen offers adding, removing, and reordering of the accounts. These options are available through the menu.
The floating action button will trigger action to add an account to the Favourites list. This will open list of all your accounts. Selecting an account on the list will assign that account to your Favourites list.
Journal
Journal lists all the transactions stored on the device.
Transaction Editor
This is the screen for editing a Transaction record. It is used when creating a new Transaction or when editing an existing one.
On the top there are three fields:
- Date
- Payee
- Note
Postings
The Postings section lists the Postings attached to the Transaction.
It shows the Posting fields:
- Account
- Amount
- Currency
The amount sign (+/-) is shown as a button and can be changed with a click.
The buttons on the top of the section allow for conducting the following operations on Postings:
- adding a new Posting
- reordering Postings
- deleting Postings
The sum of all Postings is also shown, for quick balance check.
When selecting the Amount field, the contents of the field will be automatically selected, allowing easier replacement of the whole value by simply typing in a new number.
Scheduled Transactions
The Scheduled Transactions view lists all the transactions scheduled to occur on a specific date. The transactions can be recurring.
Asset Allocation
Menu options: Validate: validates the Asset Allocation definition by comparing the sums of asset classes to the allocation of the asset class groups.
Accounts
Accounts page lists all the Accounts in the system.
The account names are colored based on their type. Assets are yellow, similar to the default text. Income is green. Expenses are red. And Liabilities are purple.
The same view as used as an Account selector when creating a new transaction. In the selection mode, selecting an Account will return to the Transaction Editor page and will show the selected Account on the Posting.
Payees
Payees page lists all the Payees in the system.
The same view as used as a Payee selector when creating a new transaction. In the selection mode, selecting a Payee will return to the Transaction Editor page and will show the selected Payee on the transaction.
Backup
In the backup screen, you can back up all locally-created data into a file.
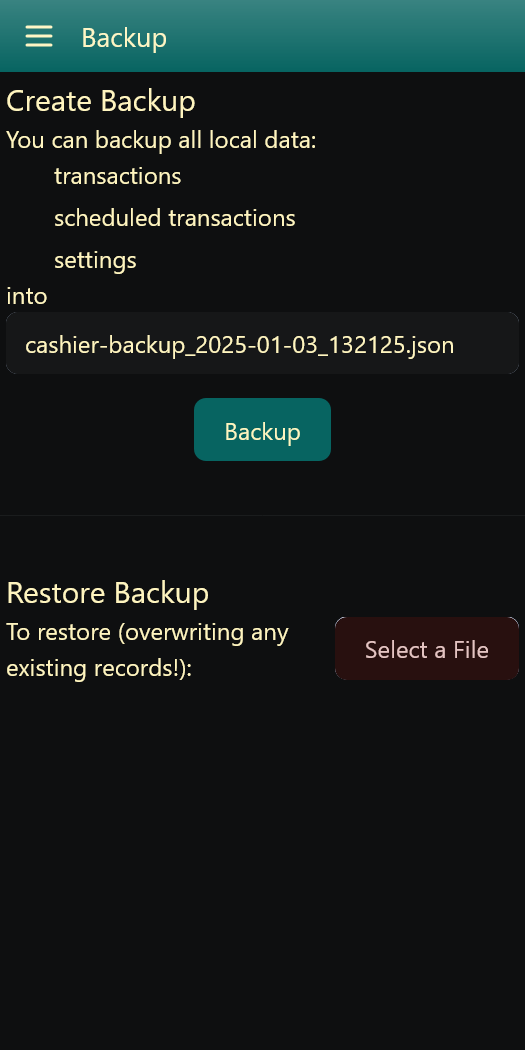
Create Backup
By clicking the “Backup” button, all
- Transactions,
- Scheduled Transactions, and
- Settings
will be output into a backup file marked with the current date and time.
Restore Backup
To restore a previously-created backup, use “Select a File” button to locate the backup file. Then confirm that this is the file you want restored. Note that this will replace any existing records already on the device.
Cloud Backup
On this screen you can backup and restore the data and settings used by Cashier.
The storage is expected to be a WebDAV server. Cashier will used the configured Server URL as the root folder to use.
Setting up a server
The recommended solution is to use RClone. This will be assumed in the description below. You can, however, use any WebDAV server you prefer. The benefit of using RClone is that you can configure any local or cloud storage
To run rclone as the WebDAV server, execute:
rclone serve webdav <source> --allow-origin "*"
where the <source> marks any source storage provider supported by RClone. This may be a folder in the local storage or any cloud storage provider. This functionality makes RClone a convenient proxy to a number of cloud storage providers out there.
Using RClone as the storage proxy removes the need for Cashier to handle access credentials to your cloud provider as you can set that up with RClone separately. There is also no need to maintain the APIs for multiple cloud providers.
Tips
Some tips to keep in mind.
If the file listing and numbers are always the same, use --dir-cache-time parameter with a short duration, i.e. 10s.
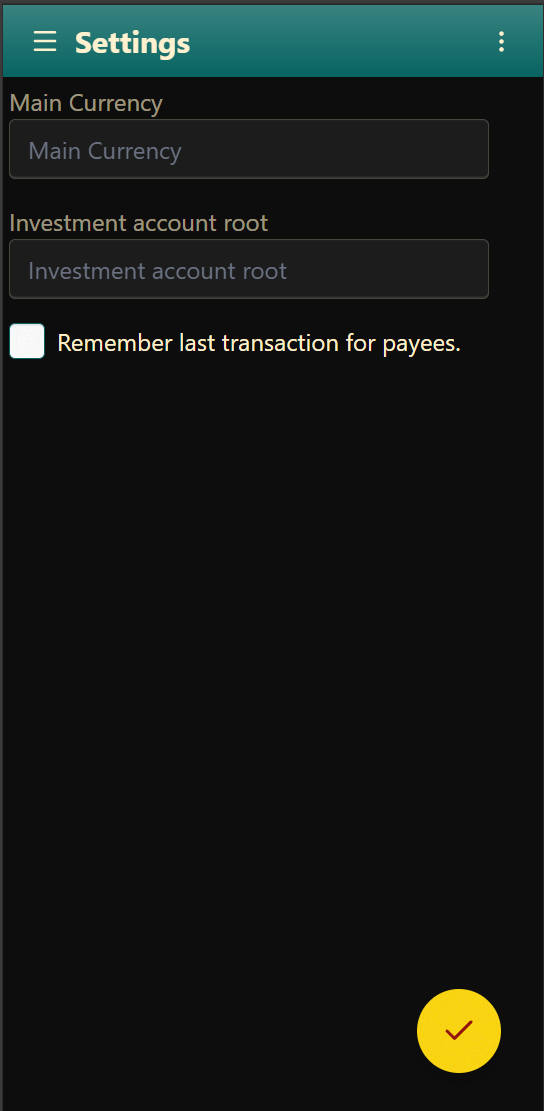
Settings
The Settings page is used to configure various application options and customizations.
- Set the Main Currency.
- Set the Investment account root, i.e.
Asset:Investments. - Choose whether to remember the last entered transaction for a payee, for quick retrieval later.
Restore
If you have backed up your settings previously, you can restore them in the Backup screen.
Synchronization
File System Synchronization
Background
To set-up the File System as the data source, you need to use a Chromium-based browser, which supports the File System API.
This provides direct access to the device file system, which allows reading your journal files. The journal is read during Synchronization and the reports.
Editable data is kept in the browser, in OPFS and IndexedDb.
Initialization
- Click the “Open Directory” button.
- Select the folder containing your journal file(s).
- Select the main journal/book file and click “Set Book” button.
- If using Asset Allocation, select the asset allocation file and click “Set Asset Allocation” button.
Export
Records can be exported out of Cashier.
Transactions
Transactions are exported in Ledger format, for easy appending to an existing journal file.
To export Transactions, you can
- click the Export button in the Journal Card on the Home screen
- select the Export menu item in the Journal menu
Scheduled Transactions
Scheduled Transactions are exported in JSON, primarily for backup purposes. These can be imported back into the application, restoring the full list.